Still Life Set Ups: A Comprehensive Guide
Introduction – 5 Day Agenda
Setting up a still life is an exciting journey into the world of artistry and photography. This
comprehensive guide offers a structured five-day agenda to hone your skills. Day-by-day, you’ll
explore creating your own light box and viewfinder, selecting objects, composing, photographing,
and editing your still life. You’ll also delve into sketching and painting techniques, making this
a holistic artistic exploration. Whether you’re a beginner or seeking to refine your craft, these
detailed steps will not only guide you through the technical aspects but will also offer a creative
strategy to unlock your potential. Join me in transforming ordinary objects into extraordinary art!
DAY 1: CREATE A STILL LIFE LIGHT BOX AND VIEWFINDER
The first step in mastering a still life setup is building a dedicated space for your objects. A
still life light box provides an isolated environment where you can control lighting and focus.
This helps create a uniform backdrop that accentuates your subject. Additionally, learning to use
a viewfinder aids in selecting the perfect composition and angle.
On Day 1, you’ll gather materials like cardboard, matte white paint, and a basic lighting kit
to construct your light box. The focus will be on how to cut openings in the cardboard while
ensuring stability and flexibility in positioning lights. The viewfinder, made from simple materials
like card stock, will aid in visualizing your composition, offering a preview before you start shooting.
DAY 2: GATHER OBJECTS FOR YOUR STILL LIFE
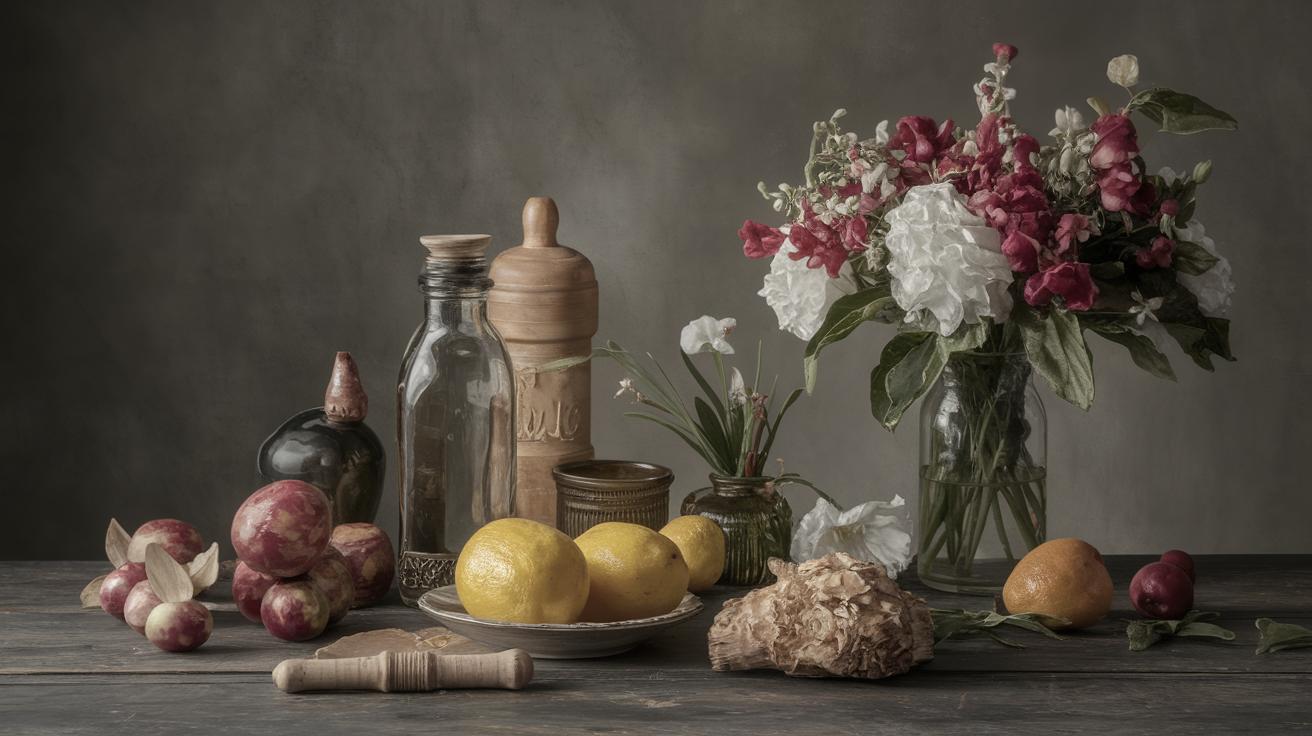
With your light box and viewfinder ready, the next phase is to select your objects. Items that
narrate a story, either through thematic cohesion or contrast, are ideal. Consider textures,
shapes, and historical or personal significance. Your collection of objects is not just
about aesthetics but is the foundation of your still life.
Day 2 is all about exploration. Visit local thrift stores, dig through your attic, or explore nature
for elements that speak to your artistic sensibility. This day relies both on intuition and practical
considerations, as you balance elements such as scale, color, and narrative to compile a cohesive still life.
DAY 3: CREATE STILL LIFE AND PHOTOGRAPH IT
Armed with your curated objects, Day 3 focuses on arrangement and photographic documentation. This
blending of artistry and technique is crucial; a well-composed still life can evoke stories
and emotions. Pay attention to how the objects interact with the light and each other within the frame.
Learn to be meticulous yet flexible, experimenting with different compositions and shooting from
various angles. Utilizing your viewfinder will assist you in locking down on the best perspective.
Take multiple shots under different exposures, ensuring you capture the potential of your setup
for later editing and sketching.
DAY 4: EDIT THE PHOTOS AND BEGIN YOUR SKETCH
Day 4 introduces you to editing and sketching, both essential in translating your vision from
conceptualization to realization. Editing your photographs involves adjusting contrast, brightness,
and colors to highlight the essential features. This step is key in developing a reference for your
sketch.
Following the edits, you can start transforming your visual story into a sketch. This process demands
a keen eye for detail, focusing on translating textures and forms onto paper. Use the edited photos
as a guide, applying sketching techniques that prepare the groundwork for the painting in the days ahead.
DAY 5: START PAINTING
The culmination of your still life project is Day 5, where you breathe life into your composition
through color and brush strokes. The painting begins in earnest as you transfer your sketched outlines
to canvas.
Pay attention to your color palette, ensuring consistency and harmony with your preliminary plans.
Use painting techniques that give depth and richness to your artwork while staying faithful to your
initial vision. This step is where patience meets creativity, bringing together the elements from
Days 1 to 4 in vivid and unique expression.
YOUR APPROACH TO THIS PROGRAM?
Reflecting on this five-day journey, consider your personal approach and the methods that resonated
most with you. Understanding how each step contributed to your overall development is crucial. What
challenges did you face, and which solutions worked best? Use this moment to assess your growth and
potential areas for improvement.
Think about how this structured process can be applied to future projects. Documenting your reflections
can be invaluable as you continue to explore and expand your artistic boundaries. Engaging actively
with each stage not only elevates your current project but lays the foundation for a lifelong pursuit
of artistic excellence.
Materials You’ll Need for a Still Life Lightbox And Viewfinder
Collecting the right materials is essential for crafting effective artistic tools. For your lightbox,
gather cardboard boxes, white matte paint or poster board for lining, and adhesive tape or glue for
assembly. Lighting needs can be fulfilled by desk lamps or LED strips that offer adjustable settings.
For the viewfinder, you’ll need sturdy card stock, a ruler, and a utility knife to cut precise shapes.
Simple as it may be, this tool is crucial for honing your artistic eye and understanding framing and
perspective in still-life arrangements.
Build a Still Life Lightbox Instructions
To create your lightbox, start by selecting a sturdy cardboard box with dimensions suitable for your
intended still life. Once you’ve got your box, cut out all faces except the base, preserving a half-inch
border around each cutout as a frame.
Use white poster board or paint to line the interior surfaces, which helps in evenly distributing light.
Once lined, place your light sources around the openings, allowing for even lighting across the interior
space. Configure the lights until the shadows and highlights complement your objects.
To Create the Viewfinder
Crafting a viewfinder is a straightforward process. Start by cutting a 4×6 inch rectangle out of card stock.
Then, draw lines dividing the rectangle into thirds both horizontally and vertically — these guide lines
assist in visualizing the Rule of Thirds in composition.
You can manipulate your viewfinder by holding it up to frame your setup, adjusting until you find the
balance and focus you seek. This process is exceptionally beneficial in pre-visualizing changes before
making physical adjustments to your still life.
Three Ways to Use the Still Life Light Box
The primary function of a still life light box is controlling light. By manipulating lamp positions,
you can create high-contrast scenes or soft, uniform lighting, each eliciting different moods. Use
the light box for consistent results across sessions or to experiment with shadows and highlights
creatively.
Additionally, the confined space of the light box helps focus attention on your subject. With fewer
distractions, viewers can appreciate the nuanced details in your composition. Lastly, it serves as a
portable studio, making it easier to set up and adjust your scenes at a moment’s notice.
Check out how the Viewfinder Works!
The viewfinder acts like a window into potential compositions, enabling you to preview and experiment
with various arrangements and framing. Bring it with you during your object-gathering missions to
test prospective still-life pieces.
The guide lines assist in achieving balanced compositions by adhering to art principles, such as the
Rule of Thirds. This practice helps in producing compositions that are more engaging and dynamic.
Over time, you’ll internalize this way of seeing, enhancing your compositional abilities even without
the viewfinder in hand.
4 Things To Consider When Collecting And Compiling a Still Life
#1 Object Theme
An initial consideration is the theme of your still life. Decide whether you want to tell a story,
convey an emotion, or highlight the object’s form and function. Thematic coherence among objects
strengthens your narrative, engaging viewers more effectively.
#2 Composition Complexity
Balance simplicity with complexity. Too many elements can overwhelm, while too few might not capture
interest. Aim for a composition that invites the viewer’s eye to move naturally, from focal points
to subtler details, sustaining engagement.
#3 Lighting
Consider how lighting affects the mood and perception of your still life. Different light sources
and angles can wholly transform the aesthetic of the scene, from dramatic and stark to tranquil and
diffuse. Experiment until you achieve the desired effect.
#4 Color Scheme
A cohesive color scheme ties your composition together. Whether you opt for monochrome for a minimalist
effect or vibrant colors for energy, the scheme should complement the narrative and enhance viewer
engagement.
Your Homework
The next step in your journey involves reflecting upon what you’ve learned and applying it independently.
Craft and document a new setup using your lightbox and viewfinder, paying particular attention to one
of the elements discussed, like lighting or thematic cohesion.
Take notes on what works or any obstacles faced during the process. This homework serves as a personal
checkpoint, allowing you to fine-tune your approach and deepen your understanding of still life setups.
Layout the Composition and Photograph
Tools You’ll Need Today
For this stage, ensure you have your camera or smartphone, a tripod to maintain stability, and any
additional lighting sources. These essentials help in capturing clear, focused images of your still life,
exemplifying the arrangement’s depth and detail.
What I Look for in The Composition
In evaluating composition, I focus on balance, harmony, and the narrative conveyed by object interaction.
Ideal compositions guide the viewer’s eye smoothly from focus point to supporting details, maintaining
interest throughout.
Photoshop Photo Editing And Sketching
How to Use Apple iCloud.com to Select Your Photos
Apple iCloud.com offers seamless photo management. Use it to review your shots on a larger screen,
selecting those that best showcase your setup’s potential. This step is crucial in refining your visual
direction before proceeding.
Editing in Photoshop
In Photoshop, adjust levels, curves, and saturation to bring out your composition’s vividness. These edits
highlight essential features and harmonize light and shadows, resulting in a polished photographic reference
for your sketching and painting.
Sketch Using Triangle Grid Method
The Triangle Grid Method is an effective technique for translating your photograph into a precise sketch.
By dividing your reference photo and canvas into proportional triangles, you maintain accuracy and
proportionality in your drawing.
This method is particularly useful in complex compositions, helping you map out the placement of elements
with geometric guidance. It offers both precision and flexibility in interpreting your visual reference
into a sketch.
Seal the Sketch
Before applying paint, sealing your sketch ensures longevity and color vibrancy. Use a fixative spray to
bind the graphite or charcoal to the canvas, providing a stable foundation for successive painting layers.
This step minimizes potential smudging and maintains the clarity of outlines, crucial for a smooth
transition into the painting phase. The act of sealing also serves to cement your commitment to the
painted rendition ahead.
Paint with me an Orange Still Life
Painting an orange still life focuses on capturing the vibrancy and texture of the fruit. Begin with
an underpainting in neutral tones, laying the groundwork for more detailed color applications. Pay
special attention to the waxy sheen of the fruit, replicating it through careful glazing techniques.
Incorporate contrasting elements, like leaves or reflective surfaces, to enhance the composition. As you
layer colors and refine details, the goal is to capture both the visual and sensory essence of the orange,
translating it into a vivid portrayal.
Paint with me a Christmas Still Life – Part 2
For a Christmas-themed still life, blend traditional elements like holly, ornaments, and candles into your composition.
The focus here is on striking a balance between festive opulence and artistic harmony.
Employ rich reds, greens, and golds to convey warmth and joy. Traditional seasonal elements draw viewers
in, but the challenge lies in making these symbols resonate uniquely through your personal interpretation
and attention to detail.
Lessons Learned
| Day | Activity | Key Takeaway |
|---|---|---|
| Day 1 | Create Light Box & Viewfinder | Building tools for consistent lighting and composition |
| Day 2 | Gather Objects | Thematic and narrative object collection |
| Day 3 | Photograph Still Life | Artistry in composing and documenting arrangements |
| Day 4 | Edit Photos & Sketch | Refining visual concepts through digital and manual techniques |
| Day 5 | Start Painting | Bringing your setup to life through paint |

